Showing posts with label Cookies. Show all posts

2020-12-03

Recipe: Maple Sugar Cookies

2021-12-13: Updated with tweaks from my latest batch, the best yet!
I also added weight equivalents for most of the ingredients.
I also added some notes for what, if anything, to adjust when doubling the recipe, which is what I usually do for giving away cookies during the holidays.

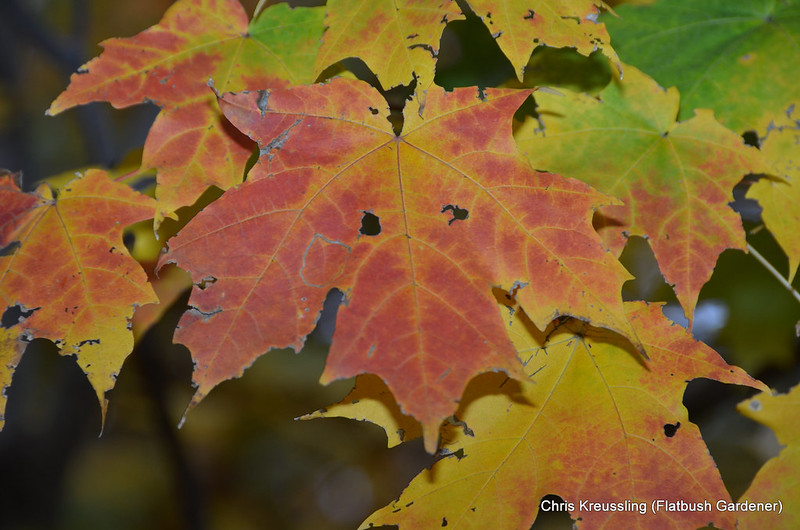
Leaves of Acer saccharum, sugar maple, Inwood Hill Park, November 2015

Living in New York City most of my life, I'm not in what one would think of as "maple country". But the northeast is rich with sugarbushes - the managed groves and forests of maple trees from which sap is harvested and boiled down to make this nectar of the gods. And nearly every NYC Greenmarket (farmers' market) has at least one farmer that sells maple syrup and other maple prodcuts, even if it's not their primary business.

2019-12-05

Molasses Spice Cookies

A friend just asked me for my spice cookie recipe. I was surprised to find my current recipe wasn't already up on the blog - the last time was in 2008! So, here it is ...


King Arthur Flour provides weight equivalents for the volume measures in many of their recipes. I use a kitchen scale and weigh bulk ingredients like sugar and flour whenever possible. It's much faster, more accurate, and leads to more consistent results. It also reduces cleanup, since fewer measuring cups are involved! This is especially convenient for liquid or sticky ingredients like the molasses in this recipe.

I used whole wheat flour instead of all-purpose, sifting it and leaving out the coarsest remaining bran to give it a finer texture. Since I had "robust" molasses, and I was using whole wheat flour, I increased the total amount of spices. I also added vanilla, allspice, and of course cardamom, none of which were in the original recipe. This created a complex taste, where none of the flavors overwhelm, but I think I would miss any I left out.

2018-12-01

Grief and Baking: Rolled Holiday Butter Cookies

Today is World AIDS Day. By coincidence, the 41st president also just died, reminding me - and the cohort of survivors from his dark reign - how many more of us died on his watch from inaction, and more active hatred.

It's also my dad's mortiversary, the 10th anniversary of his death.

As I did ten years ago, I turned to baking. In anticipation of our upcoming tree-trimming party, and a hoped-for cookie-decorating side activity, I chose a rolling cookie recipe from King Arthur Flour. Since I'm unfamiliar with this type of cookie, I stayed as close as I could to the original recipe.

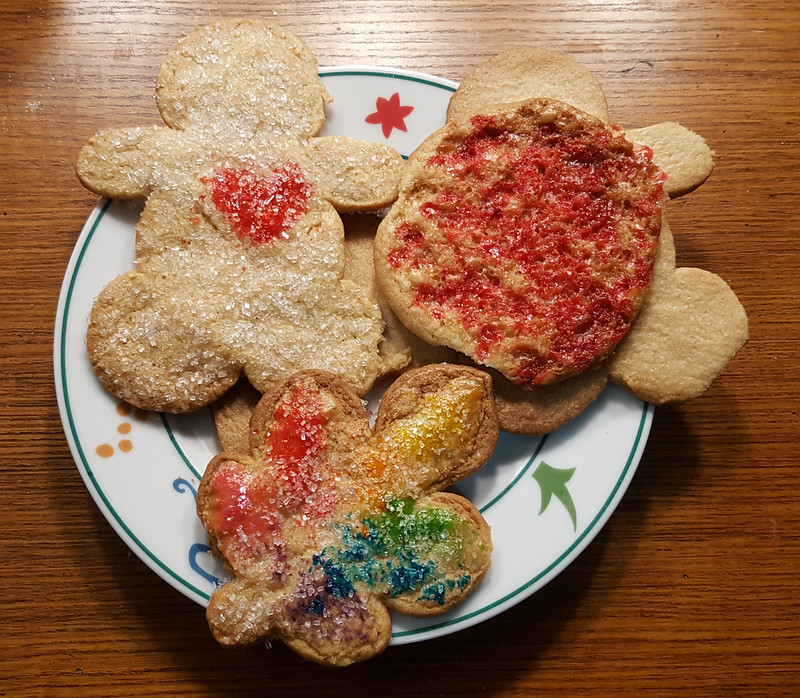
Holiday Butter Cookies, December 2018

I consider these a qualified success. There are some improvements I can make, mostly about technique. I'm happy with the basic recipe.

2016-02-20

Recipe: Crisp and Chewy Chocolate Chip Cookies

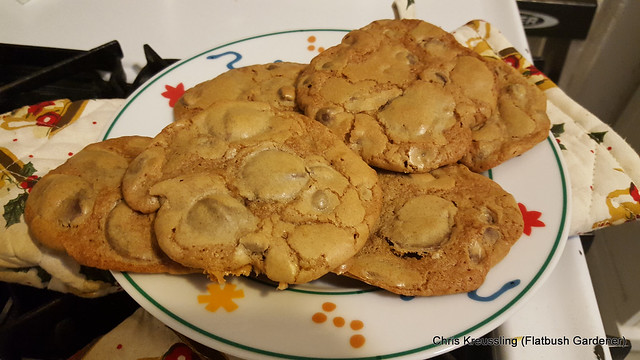
Chocolate Chip Cookies, finished and still warm, February 2016

These cookies have been taste-tested recently at a going-away party and after-church coffee hour. Adults rave about this cookie. You will have no leftovers, even from a double batch.

I've been working on this recipe for a while, and I think I've finally got it to where I want it.

2008-12-23

Recipe: Soft Molasses-Spice Cookies with Cardamom

No photos (yet) for this recipe. My motivation for this experiment was making use of a spice that was new to me: cardamom.

Cardamom

A couple of weeks back, on the recommendation of a friend of ours who's a professional chef, I picked up some ground cardamom (alt: cardamon) for baking. I'm unfamiliar with this spice and had never used it before this recipe.

It's intensely fragrant; even closed, the small baggie of loose cardamom I bought at the Flatbush Food Co-op has been perfuming our kitchen and dining room. It smells like Christmas gingerbread. The scent has strong citrus tones, and at first I thought it might be in the Rutaceae, the Citrus family. But it comes from the Zingiberaceae, the Ginger family, which also makes sense.

The plant is Elettaria cardamomum, a mono-specific genus native to a wide range in southeast Asia. (Some authorities separate the Sri Lankan population as its own species.) The fruit is a pod, a capsule containing multiple seeds. The spice is made from the ground seeds.

Credit: JoJan (Wikimedia Commons)
Cardamom fruit, seeds, and ground spice

Elettaria cardamomum under cultivation. Credit: Rhaessner (Wikimedia Commons)
Elettaria cardamom under cultivation

Searching for recipes on the Web, I found that cardamom is a common ingredient in many recipes from Nordic countries. I'm not familiar with Nordic cuisine, so I wouldn't be able to judge so well the success of my baking endeavor. Cardamom also shows up in many gingerbread recipes, so I fell back on something more familiar to me to try out: molasses spice cookies. Once again, King Arthur Flour provided the basic recipe which I tweaked to make use of my available ingredients.

Ingredients

KAF provides weight equivalents for the volume measures in many of their recipes. I use a kitchen scale and weigh bulk ingredients like sugar and flour whenever possible. It's much faster, more accurate, and leads to more consistent results. It also reduces cleanup, since fewer measuring cups are involved! This is especially convenient for liquid or sticky ingredients like the molasses in this recipe.

I used whole wheat flour instead of all-purpose, sifting it and leaving out the coarsest remaining bran to give it a finer texture. Since I had "robust" molasses, and I was using whole wheat flour, I increased the total amount of spices. I also added vanilla, allspice, and of course cardamom, none of which were in the original recipe. This created a complex taste, where none of the flavors overwhelm, but I think I would miss any I left out.

Yield: About four dozen (48) cookies
  • 2 sticks (1 cup, 8 ounces) unsalted butter
  • 7 ounces (1 cup) sugar
  • 6-1/4 ounces (a little more than 1/2 cup) molasses, robust flavor. (6 ounces would have been 1/2 cup.; the extra 1/4 ounce was a mistake on my part, but I recorded it as what I did.)
  • 2-1/4 teaspoons baking soda
  • 1 teaspoon salt
  • 1 teaspoon cinnamon
  • 1 teaspoon cloves
  • 1 teaspoon ginger
  • 1 teaspoon allspice
  • 1 teaspoon cardamom
  • 2 teaspoons vanilla extract
  • 2 extra large eggs (original called for large)
  • 14 ounces whole wheat flour (not sure of the volume equivalent)
  • sugar, for coating (This gives the outside of the cookies some crunch. The recipe calls for coarse or even pearl sugar, for more crunch. I'd use them instead if I had them.)

Preparation

  1. Let the butter come to room temperature, if possible, for easier creaming.
  2. Preheat the oven to 350F. (Be sure you have an accurate oven thermometer! I had a devil of a time baking in our horrible kitchen until I bought a thermometer and discovered that the oven dial was off by 100F!)
  3. Prepare a small bowl with some of the sugar for coating the cookies.
  4. (The recipe calls for greasing baking sheets or lining them with parchment. Since I have some well-seasoned, non-stick baking sheets, I didn't bother and it wasn't necessary.)

Mixing

  1. Cream together the butter and sugar until they're light and fluffy.
  2. Beat in the the molasses, salt, and spices. (Here's where you can taste-test to adjust if needed. I added the spices at 1/4 or 1/2 teaspoon at a time to make sure I didn't over do it. I ended up with 1 teaspoon of each, as listed above.)
  3. Beat in the baking soda.
  4. Add the eggs one at a time, beating until they're mixed well into the batter. Scrape down the sides of the bowl and the beaters and mix well.
  5. Slowly stir in the flour. (This is something I've learned recently. Stirring the flour in at low speeds keeps the cookies tender. Beating the flour in at higher speeds makes the cookies tougher.) Scrape down the sides of the bowl and the beaters and mix well.
This is a fairly soft, wet dough. Although I didn't try it this time, I bet you could refrigerate the dough for a few hours, or even overnight, to set up before baking.

Baking

  1. Using a tablespoon cookie/ice-cream scoop, create a small ball of the dough. (A scoop is the fastest, easiest way to get a consistently sized, professional looking, batch of cookies. You could also just use two tablespoons.)
  2. Drop the dough ball onto the coating sugar. Coat thoroughly.
  3. Place the coated dough ball on the baking pan. Space them evenly, and leave plenty of space for them to spread. (The recipe says leave 2-1/2" between them, which sounds about right.)
  4. Bake for at least 10, at most 11, minutes at 350F. (With experience, your nose and eyes are the best guides here. When they smell like they're just starting to burn, and the edges are visibly just darker than the center, they're done.)
  5. Remove the pan and let it cool for 5-10 minutes.
  6. Move the cookies to a wire rack to cool completely. (But try at least one with a glass of cold milk while it's still warm!)

Related Posts

Other recipes on this blog

Links

Soft Ginger-Molasses Cookies and Ginger Syrup, Recipes, King Arthur Flour

2008-12-16

Grief and Baking: Peppermint Swirl Meringue Cookies

Updates 2014-12-13: Simplified the baking temperature and time, and added notes about portion sizing.

Yesterday it was hard for me to do anything. Although the weather was perfect - 60s and partly sunny - for planting the bulbs I have yet to get into the ground, I could not bring myself to go outside. It's only been two weeks since my father died, and I was feeling his absence deeply and sharply yesterday. When I wrote that "there's so much of him in me," I didn't appreciate how much I would feel a loss of my own self, a void left standing where "the library burned down." It reminds me of the hole in the sky where the twin towers of the World Trade Center once stood. The absence is palpable.

By the end of the day, I was feeling a little better, and I thought that surrendering to my winter baking mode would help. I was prepared to make some basic chocolate chip cookies, but Blog Widow came home with a box of soft, store-bought ones. I experimented with something new, and here's what I came up with:
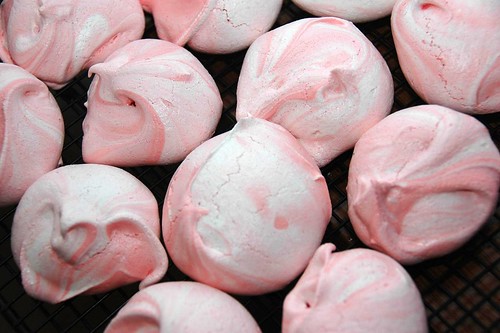
Peppermint Swirl Meringue Cookies

I call these Peppermint Swirl Meringue Cookies, an elaboration of a basic meringue recipe from King Arthur Flour. KAF is my favorite source for all things baking. I was happy to find that the Flatbush Food Co-Op carries several varieties of King Arthur Flours in the well-stocked baking section of their new location.

I've made meringues many times before, but Blog Widow has never cared for them. He likens their texture to styrofoam, and I can't disagree. The best way to eat them is not to bite into them. Instead, let them dissolve on the tongue, releasing a burst of the flavoring baked into them.

Part of last night's experiment was to see if I could achieve a texture that would satisfy Blog Widow: crisp and crunchy on the outside, soft and chewy on the inside. The KAF recipe suggested that I could accomplish this simply by baking them for an hour less than usual. This worked beautifully. Here's a single, intact meringue cookie, the same one in the center foreground of the photo above:
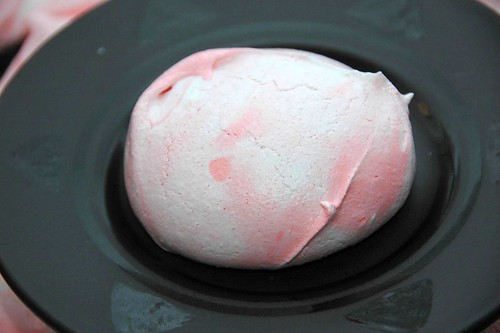
Meringue Cookie, Intact

And here's the same cookie broken open (shattered, really!) to show the chewy, slightly gooey, interior:
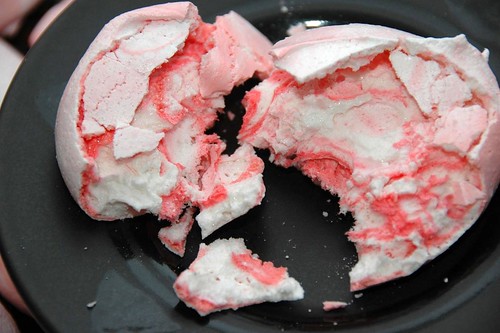
Meringue Cookie, Broken Open

Perfect. And baking these did help lighten my spirit.

Meringues are more confection than cookie. The basic ingredients are just egg whites and sweeteners: no fat and no cholesterol. Since there's no flour, they're also fine for folks avoiding gluten.

I use dried, powdered egg whites in recipes calling for them. It saves the hassle of separating them, and I don't have to figure out what to do with the yolks. However, dried egg whites can have an off, eggy taste. You want to make sure that the flavoring is assertive enough, without being too aggressive, to balance the recipe.

The classic flavoring is vanilla, but anything can be used. I thought I would make some red and green meringues with different flavorings for each color, such as cinnamon for red, lime for green. But a tip in the KAF recipe suggested coloring just half the mixture and swirling them together. White plus red stripes just screams candy cane, so peppermint was the flavor I went with. (If I had spearmint flavoring, I would also try green and white stripes.)

Here's how I made the cookies in these photos, presenting the basic KAF recipe with the slight adaptations I had to make along the way. The basic KAF recipe presents lots of possible variations, even adding nuts to the meringue, so check that out for other creative options.

Ingredients

  • Egg whites of 6 large eggs (7/8 cup, or 7-8 ounces), or 1/4 cup dried egg whites dissolved in 3/4 cups water, at room temperature (separate eggs when cold, but whip them at room temperature to get the best volume.)
  • 1/4 teaspoon cream of tartar (a mild acid which helps stabilize the whites when beaten)
  • 1/4 teaspoon salt (for flavor only. You can omit this if you need to minimize sodium, although the egg whites naturally contain sodium of their own.)
  • 1 1/4 cups extra-fine sugar (also known as sanding or castor sugar. I used regular white, refined sugar and they came out fine. A finer grain of sugar dissolves easier in the whites for a smooth, non-gritty texture.)
  • 1 1/2 cups (6 1/4 ounces) confectioner's sugar (powdered sugar)
  • 1/2 teaspoon peppermint extract
  • 1/4 teaspoon vanilla extract (The vanilla mellows and warms the peppermint, which remains the dominant flavor.)
  • red food coloring (I used a gel type.)

Preparation

  1. Preheat the oven to 250F. (Be sure you have an accurate oven thermometer! Temperature is lower than usual for baking - too high, and you'll burn, rather than bake, your meringues - and gets reduced further part-way into the baking time. I had a devil of a time baking in our horrible kitchen until I bought a thermometer and discovered that the oven dial was off by 100F!)
  2. Prepare the egg whites and set them aside to let them come to room temperature.
  3. Use the largest baking pans you have, line them with parchment paper, and set them aside. (I could only use two pans in my oven, and had to discard part of my batch because I had no more room for them.)
  4. Sift the sugars together and set them aside.

Mixing

I used a hand whisk for the slow whisking steps, and a mixer with a whisking attachment for the rest.
  1. Add the cream of tartar to the room-temperature egg whites, Whisk until the cream of tartar has completely dissolved and the whites are foamy.
  2. If using salt, add it now and whisk to dissolve that as well.
  3. Increase the whisking speed until the egg whites have doubled in volume.
  4. Add half the sugar and whisk until the whites are glossy and start to get stiff.
  5. Add the remaining sugar and whisk until the whites hold stiff peaks. (Since I didn't have extra-fine sugar, I chickened out here a little and added the sugar a little early so it would dissolve completely. I also didn't whisk completely to the hard peak stage. Just the tips of the peaks folded over, which you can see in the finished cookies.)
  6. Add the flavorings.
  7. Remove about 1/3 of the meringue into a separate bowl. Add the coloring and whisk it until it the desired color is evenly distributed.
  8. Add the colored meringue back into the other bowl on top of the white meringue. Using a spatula, gently fold the two meringues together until they are just striped. It only takes a few folds for this.

Baking

  1. Drop the striped meringue by the spoonful onto the parchment paper on your baking pans. The meringues will not spread while baking, so they can be placed as close as possible without touching each other.

    Use a tablespoon to get 3 dozen big cookies; at this size, though, I usually run out of baking sheet before I run out of batter. Use two teaspoons for more, smaller, cookies; the smaller size can be placed more closely together on the sheet, and uses up all of the batter. The smaller ones are bite-sized and easier to handle.

    You can also use a pastry bag, if you have one, for fancier cookies.
  2. Bake at 250F for 30 minutes.
  3. After 30 minutes, reduce the heat to 225F and bake for one more hour for chewy cookies, or 2 more hours for crisp-all-the-way-through cookies.
  4. Turn off the heat, crack open the oven door, and let them cool for 30 minutes.
  5. Remove them to a wire rack to cool completely.
Simplified baking option for chewy cookies: Instead of the two-stage, two-temperature method, bake at 250F for an hour.

Here's another, close-up view of the finished product.
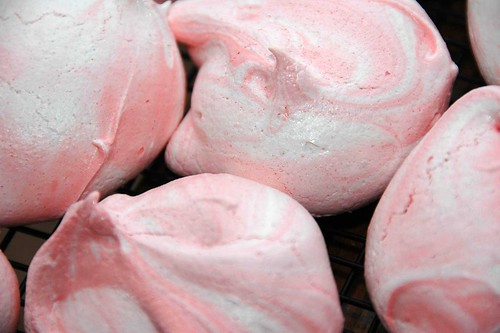
Peppermint Swirl Meringue Cookies

And oh yeah: Blog Widow labels this a successful experiment!

[http://bit.ly/5R9IxO]

Related Posts

Other recipes on this blog
The quotes in the opening paragraph come from the eulogy I wrote and read for my father's memorial service on Thursday, December 4, 2008.

Links

Meringues, Recipes, King Arthur Flour

2006-10-14

Recipe: Spice Cookies

I don't cook much, but I love to bake. Over the fall and winter I'll make cookies, cakes, rolls, bread, and so on, from scratch. It appeals to the mad scientist in me. I also like making pancakes and French toast (not really baking) for breakfast.

I made these spice cookies today. They are light and soft yet firm, not chewy, not too sweet, and very tasty. I know adults like them. I haven't tried them out on kids yet.

This is a large batch; it makes 60-70 2" wide cookies. You could cut this recipe in half.

Dry Ingredients:
  • 2 & 1/2 Cups cake flour
  • 2 teaspoons ground spices
  • 1/2 teaspoon salt
  • 1/2 teaspoon baking powder
Wet (Batter) Ingredients:
  • 1 & 1/2 Cups (3 sticks) sweet (unsalted) butter, at room temperature
  • 1 Cup brown sugar
  • 1/4 Cup sugar
  • 4 large eggs
  • 1 teaspoon vanilla extract
Directions:
  1. Preheat the oven to 350 F.

  2. Sift the dry ingredients together to remove any lumps and mix them thoroughly and set aside.

  3. In a mixer, cream the butter until it's fluffy and has a light color.

  4. Gradually add the brown and regular (refined) sugar. Cream the sugars and butter together until uniform in color.

  5. Add the eggs one at a time, mixing thoroughly after each one.

  6. Add the vanilla extract.

  7. Scrape down the bowl and blades and mix thoroughly. The batter should be light and fluffy.

  8. Add the dry ingredients gradually, mixing thoroughly.

    The result should be a light, fluffy, wet, soft dough which holds soft peaks. If the dough is too wet to hold a peak, add more flour, no more than 1/4 Cup at a time. If the dough is too dry and stiff, add a little liquid (water or milk). Mix thoroughly after each addition, until the dough has the desired consistency.

  9. Place teaspoons of dough on a cookie sheet. (A releasing ice cream scoop is the best tool for this.) Leave enough room for the cookies to spread. (Try setting them up 4x3 for the first sheet, so you can see how they spread.)

  10. Bake the cookies for no more than ten minutes.

    Keep an eye on them. The cookies will spread (because of the butter and sugar) and rise slightly (because of the baking powder and the air you whipped into them). When the texture of the tops of the cookies changes from glossy and shiny to matte and dull, or If the edges start to brown, they're done.

    If the bottoms of the cookies brown, or even burn, before the tops have set, turn the oven down -25 F.

  11. When the cookies are done, remove the tray to cool for a few minutes, until the cookies firm up, then remove them to a separate cooling rack. If you leave the cookies on the sheets, the bottoms will get soggy.
Possible substitutions:
  • You could use whole wheat flour for part or all of the cake flour. If so, be sure to sift several times.
  • The spices can be anything you like: allspice, ginger, cinnamon, nutmeg (a little goes a long way!), cloves. Today, I used the same commercial mulling spice blend, finely ground, which I used in the squash and pear soup last weekend.
  • You could omit the vanilla extract, or use a different extract, such as lemon, orange, or almond.
  • You can omit or reduce the salt.